Assets Overview
Customers are the other organizations that your company account interacts with, and creates tickets for.
During ticket creation, trakker users can select to send ticket notifications via email to users who are associated with the ticket and it’s objects from GoTrakker teams, and companies. Ticket creators can also manually add additional emails to the ticket notification list, to allow contacts without trakker accounts to receive updates as well.
| Permission Type | Permission Name |
|---|---|
| Account | Create/Edit Customers |
The available customers, and organizational structure elements that are populated during ticket creation are ultimately managed through a user's teams and their team's associated ticket access.
Customer Contacts
Customer Contacts are used to populate notification groups, and the affected customer contact
dropdown on tickets. These users are able to be added to and organized into notification groups
on tickets. Customer Contacts include basic contact information about an individual: first and
last names, and email addresses.
Customer contacts do not require an active, registered account, meaning customer contacts will not
be included in your registered user count for billing purposes. Customer contacts can be made
deactivated, but cannot be deleted.
Add New Customer Contact
Customer contacts can be added from the admin console or added directly during ticket creation.
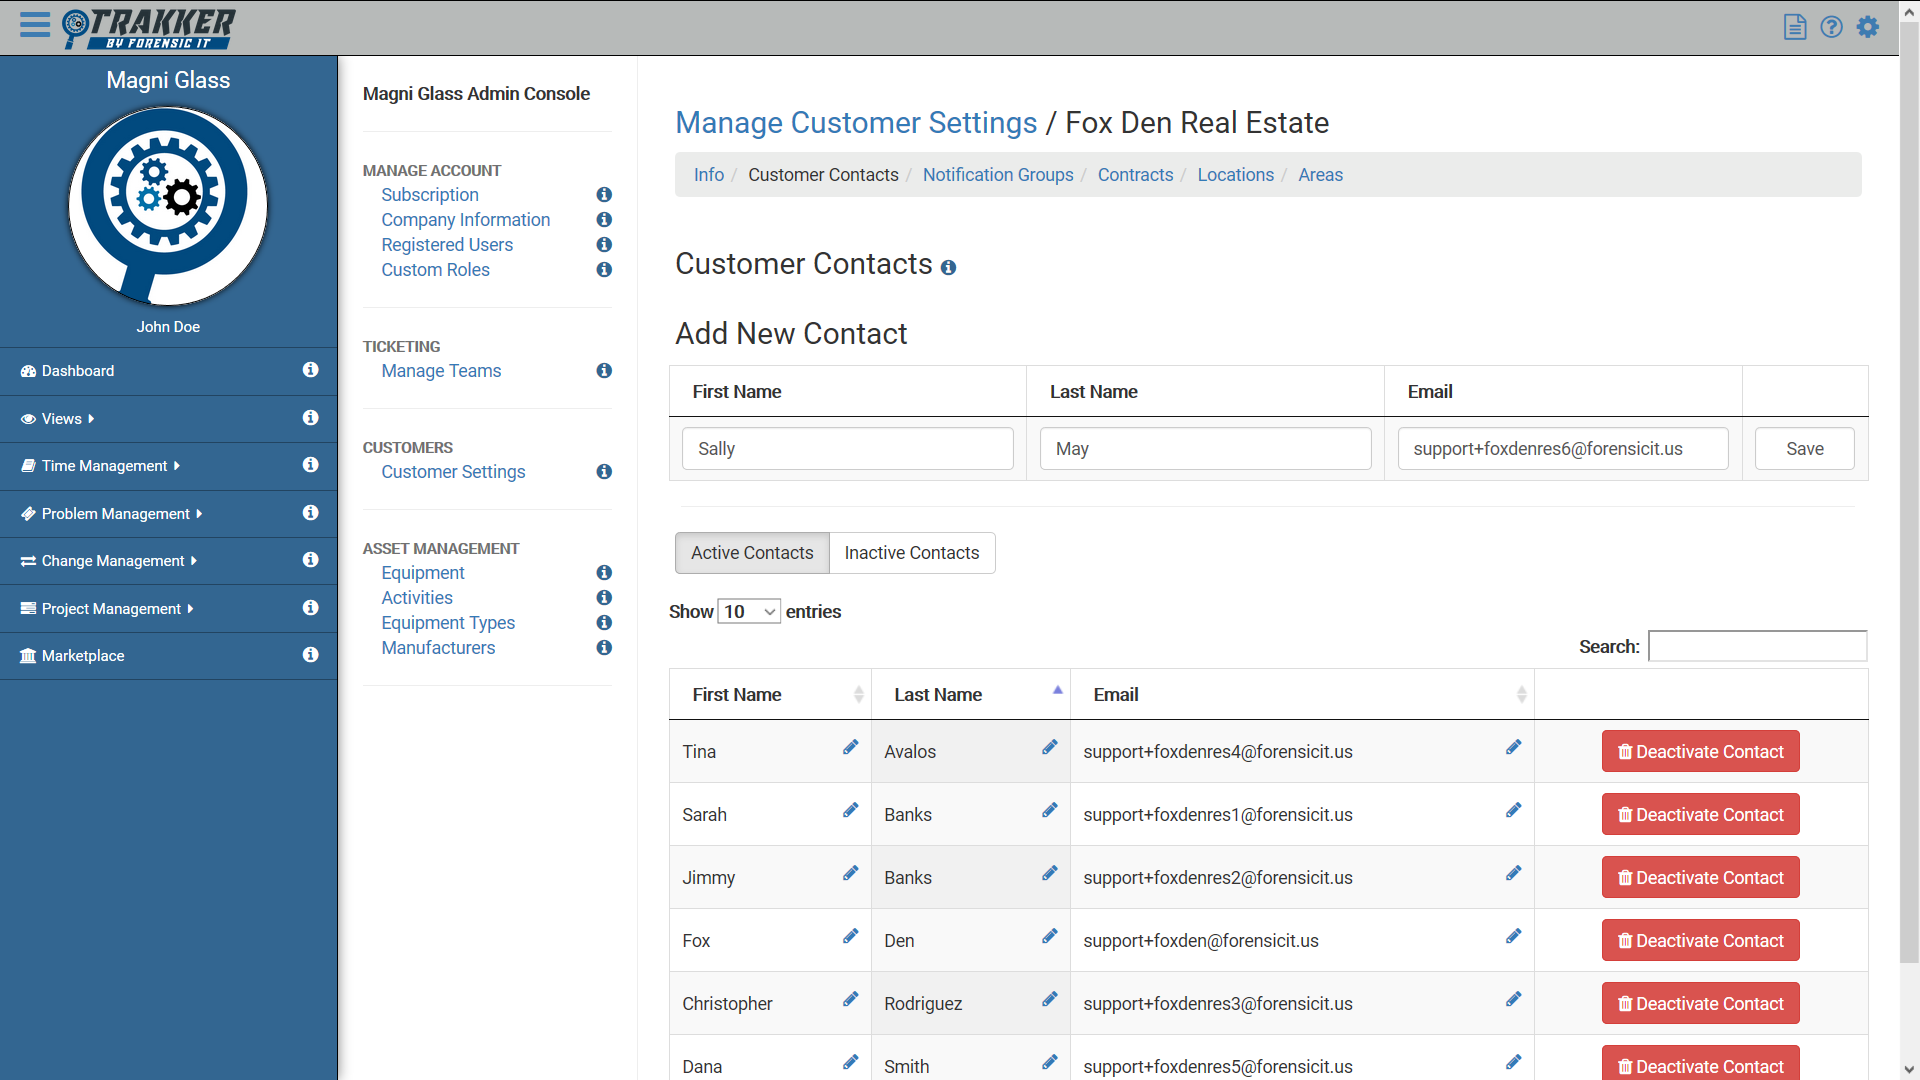
Adding customer contacts from admin pages
- Navigate to the admin console and select
Customer Settings > [Customer Name].
You will be taken to the Manage Customer Settings page for the Customer you've selected. - Select the Customer Contacts tab at the
top of the page.
The Customer Contacts page will be displayed, with a table of all active customer contacts for the selected Customer. - Fill out the Add New Contact row with the
new contact's first name, last name and email address.
When the row has been filled out, select the Save button to finish adding the Customer Contact.
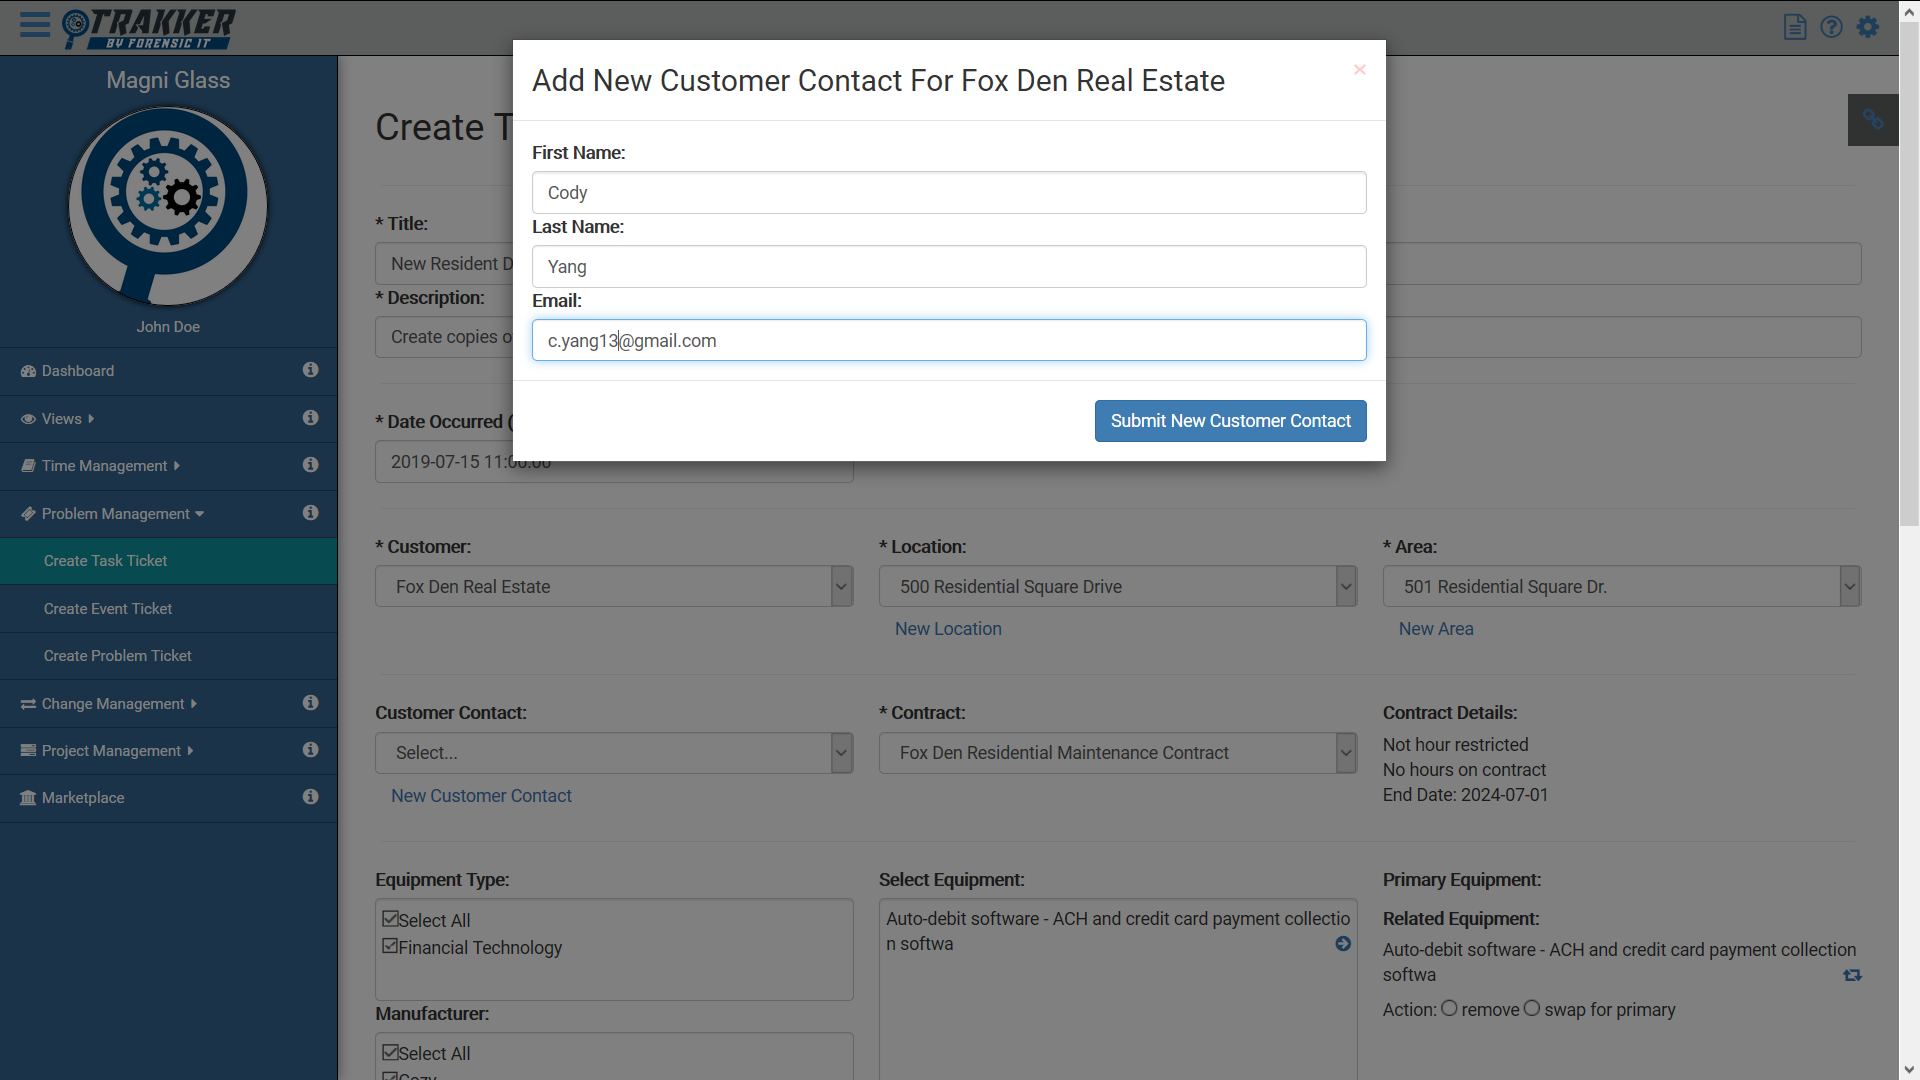
Adding customer contacts from ticket pages
-
During ticket creation, select the Customer that you'd like to add a customer
contact to during the normal ticket creation process.
After selecting a Customer, a New Customer Contact link will appear below the Customer Contact dropdown. - Select the New Customer Contact link.
The Add Customer Contact for [Customer Name] modal will appear. - Enter the new customer contact's First Name, Last Name and Email Address in the modal fields and select "Submit New Customer Contact".
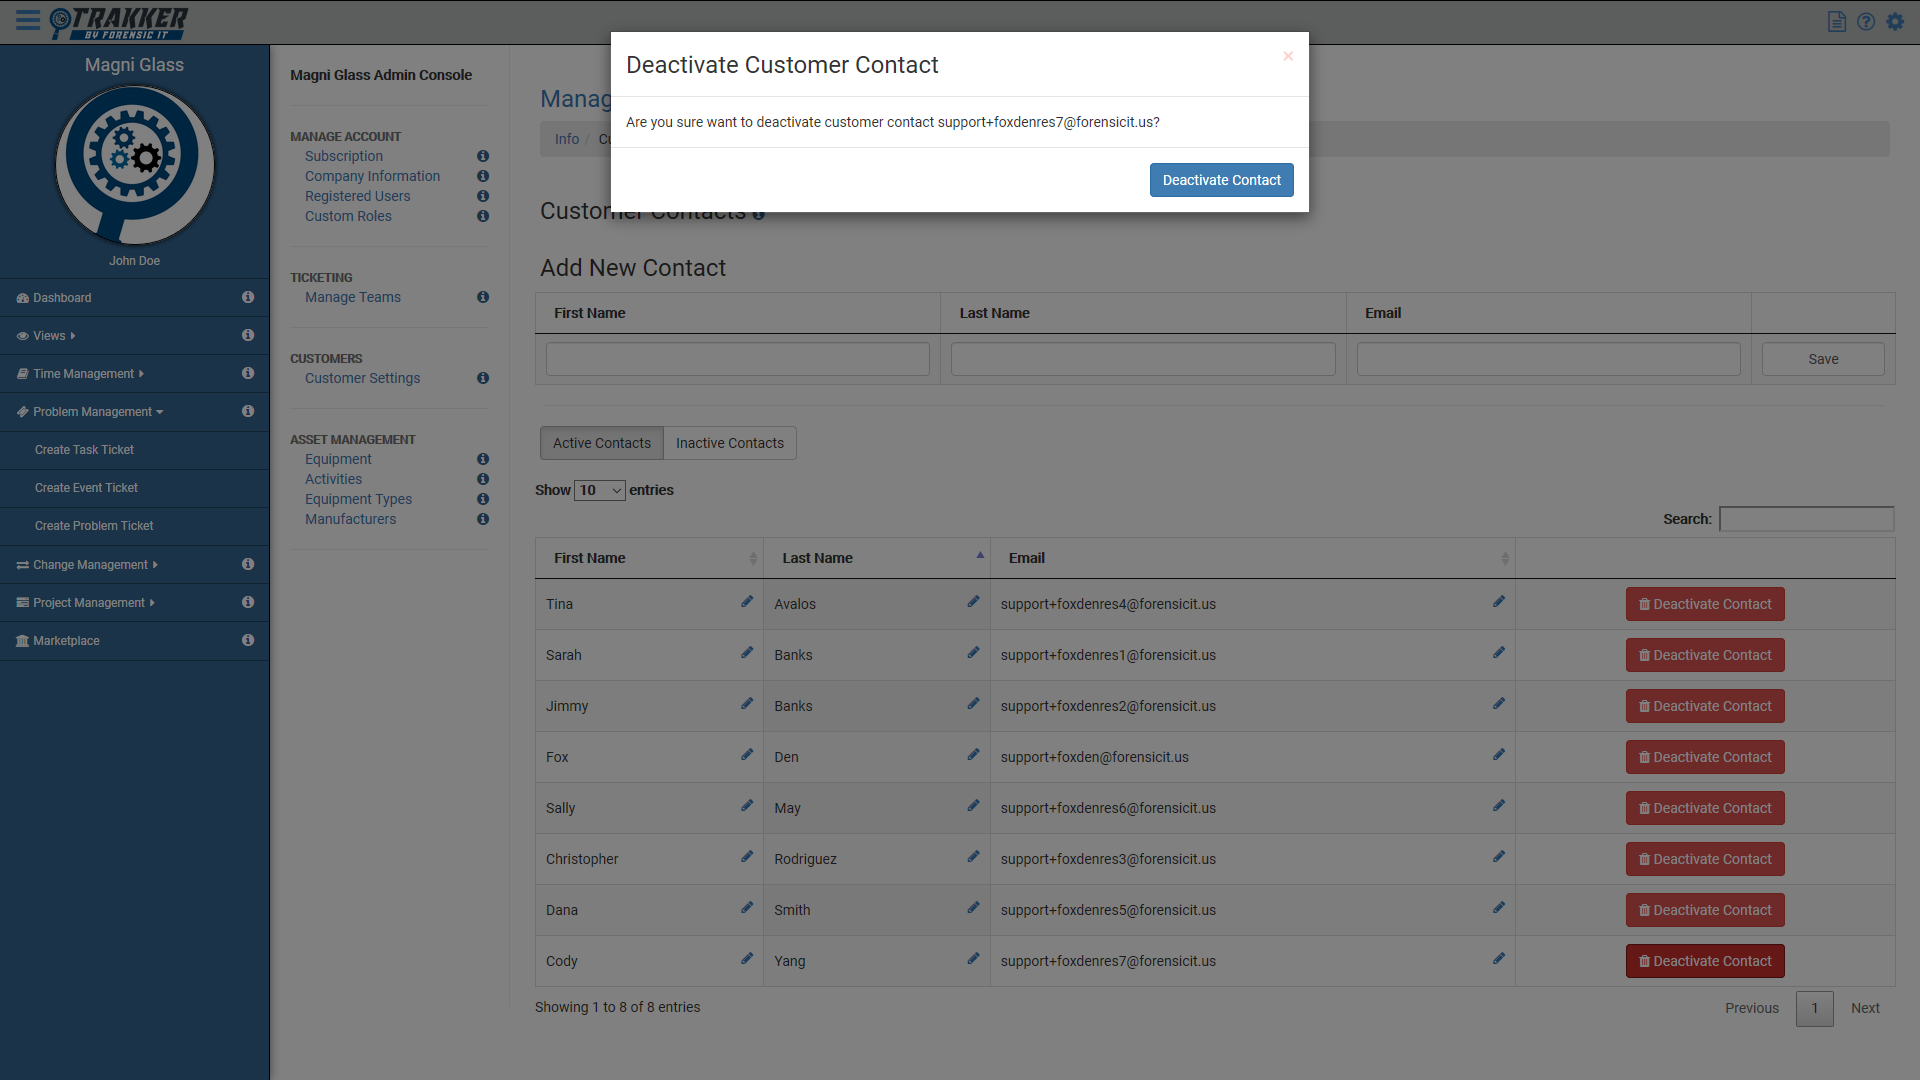
Deactivate Customer Contact
- Navigate to the admin console and select
Customer Settings > [Customer Name].
You will be taken to the Manage Customer Settings page for the Customer you've selected. - Select the Customer Contacts tab at the
top of the page.
The Customer Contacts page will be displayed, with a table of all active customer contacts for the selected Customer. -
In the table of active customer contacts, select the Deactivate Contact button.
Select Deactivate Contact on the confirmation modal to complete the deactivation.
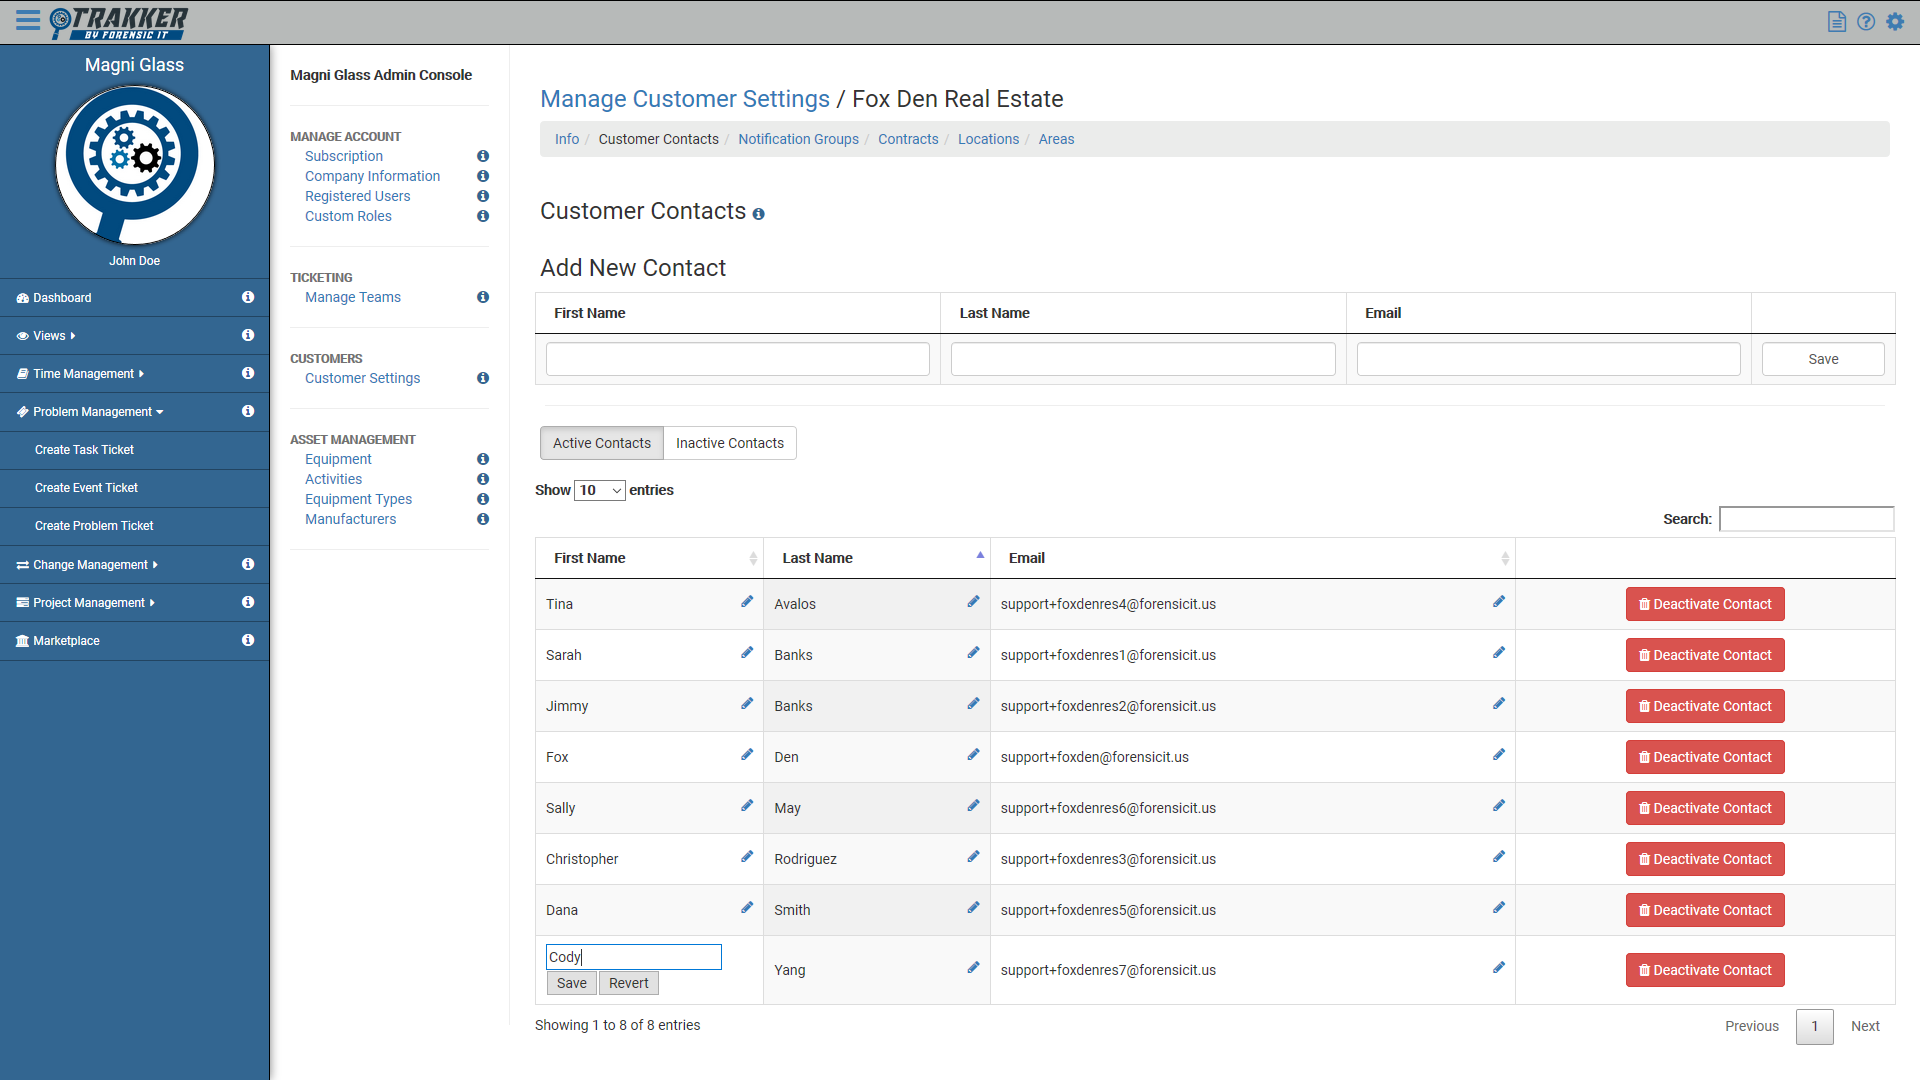
Edit Customer Contact
- Navigate to the admin console and select
Customer Settings > [Customer Name].
You will be taken to the Manage Customer Settings page for the Customer you've selected. - Select the Customer Contacts tab at the
top of the page.
The Customer Contacts page will be displayed, with a table of all active customer contacts for the selected Customer. -
In the table of active customer contacts, select the
icon next to the customer contact field
you'd like to change.
Enter the change in the table field and select the Save to confirm.
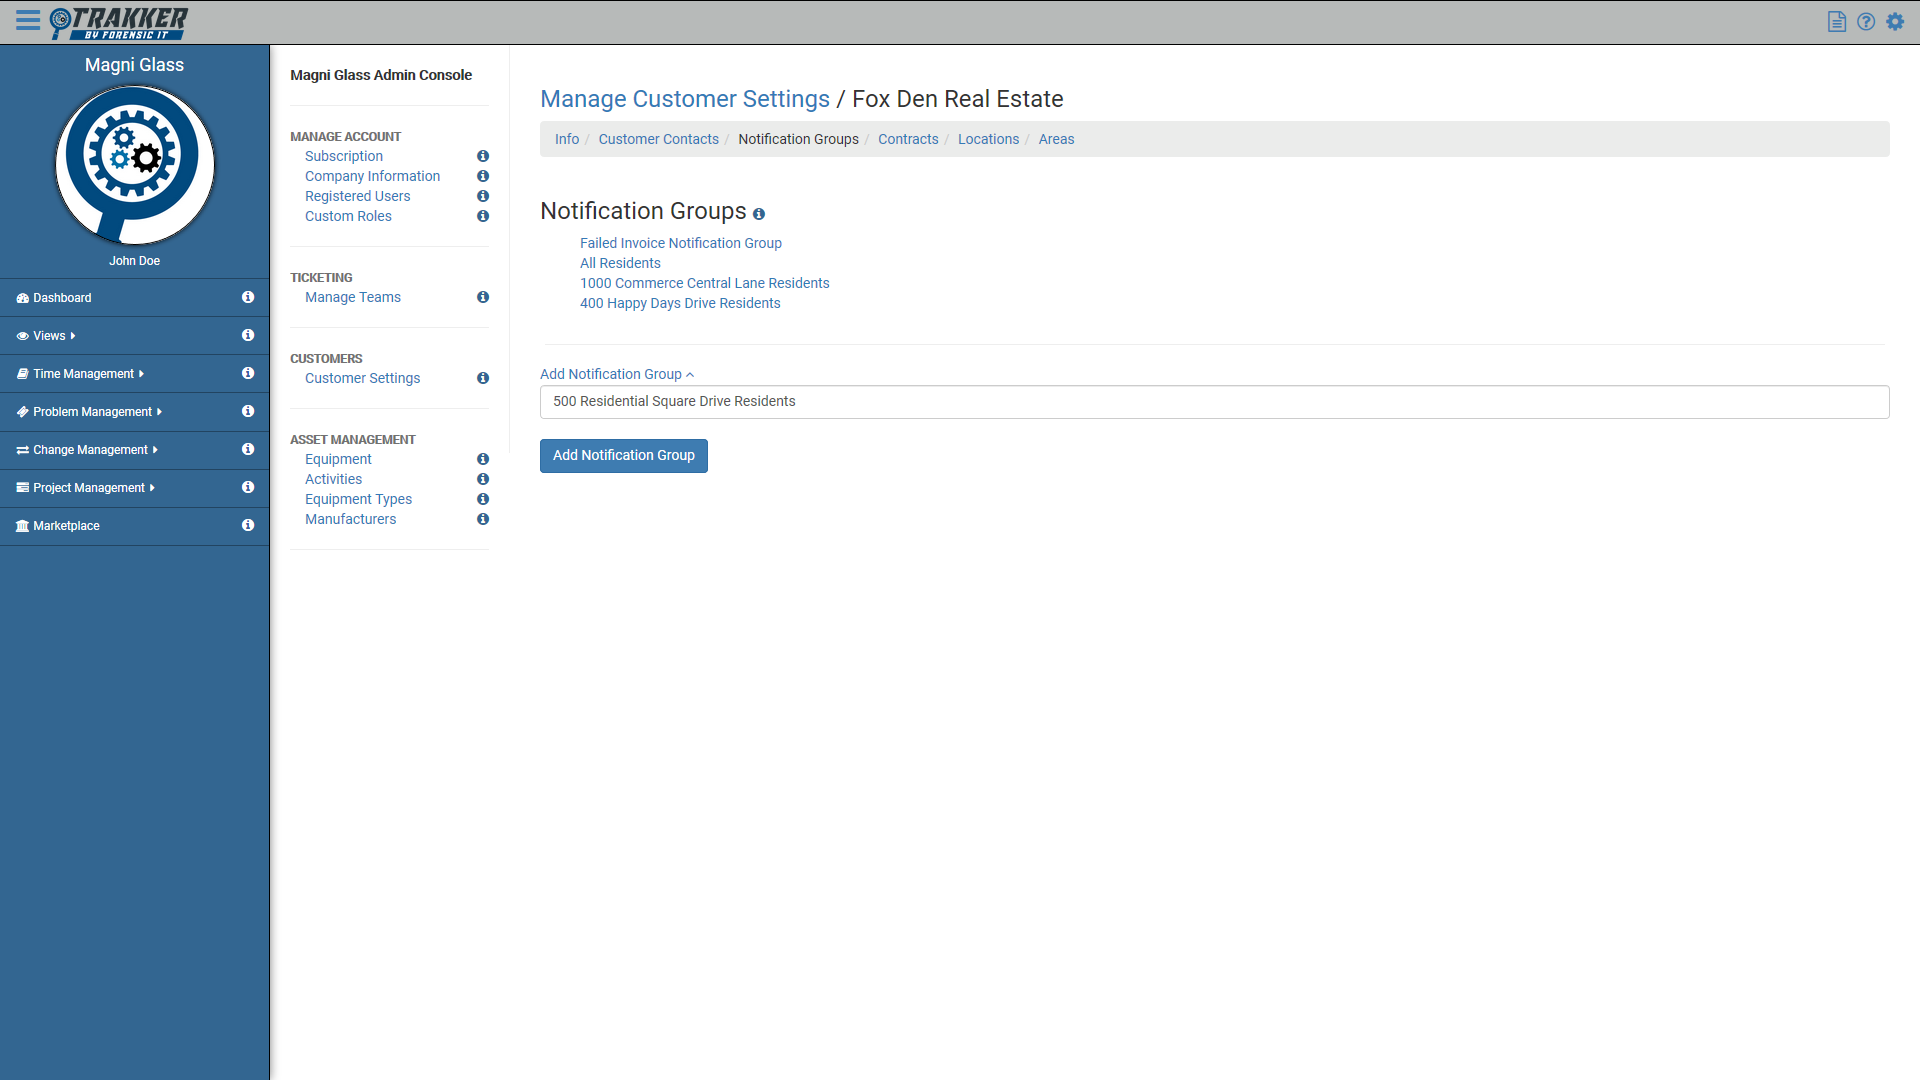
Notification Groups
Notification groups are used to manage rules for building ticket contact lists based
Add Notification Group
Please excuse our progress. We're currently putting together documentation for this feature.
If you require assistance, contact us with the direct chat in the bottom-right corner for support.
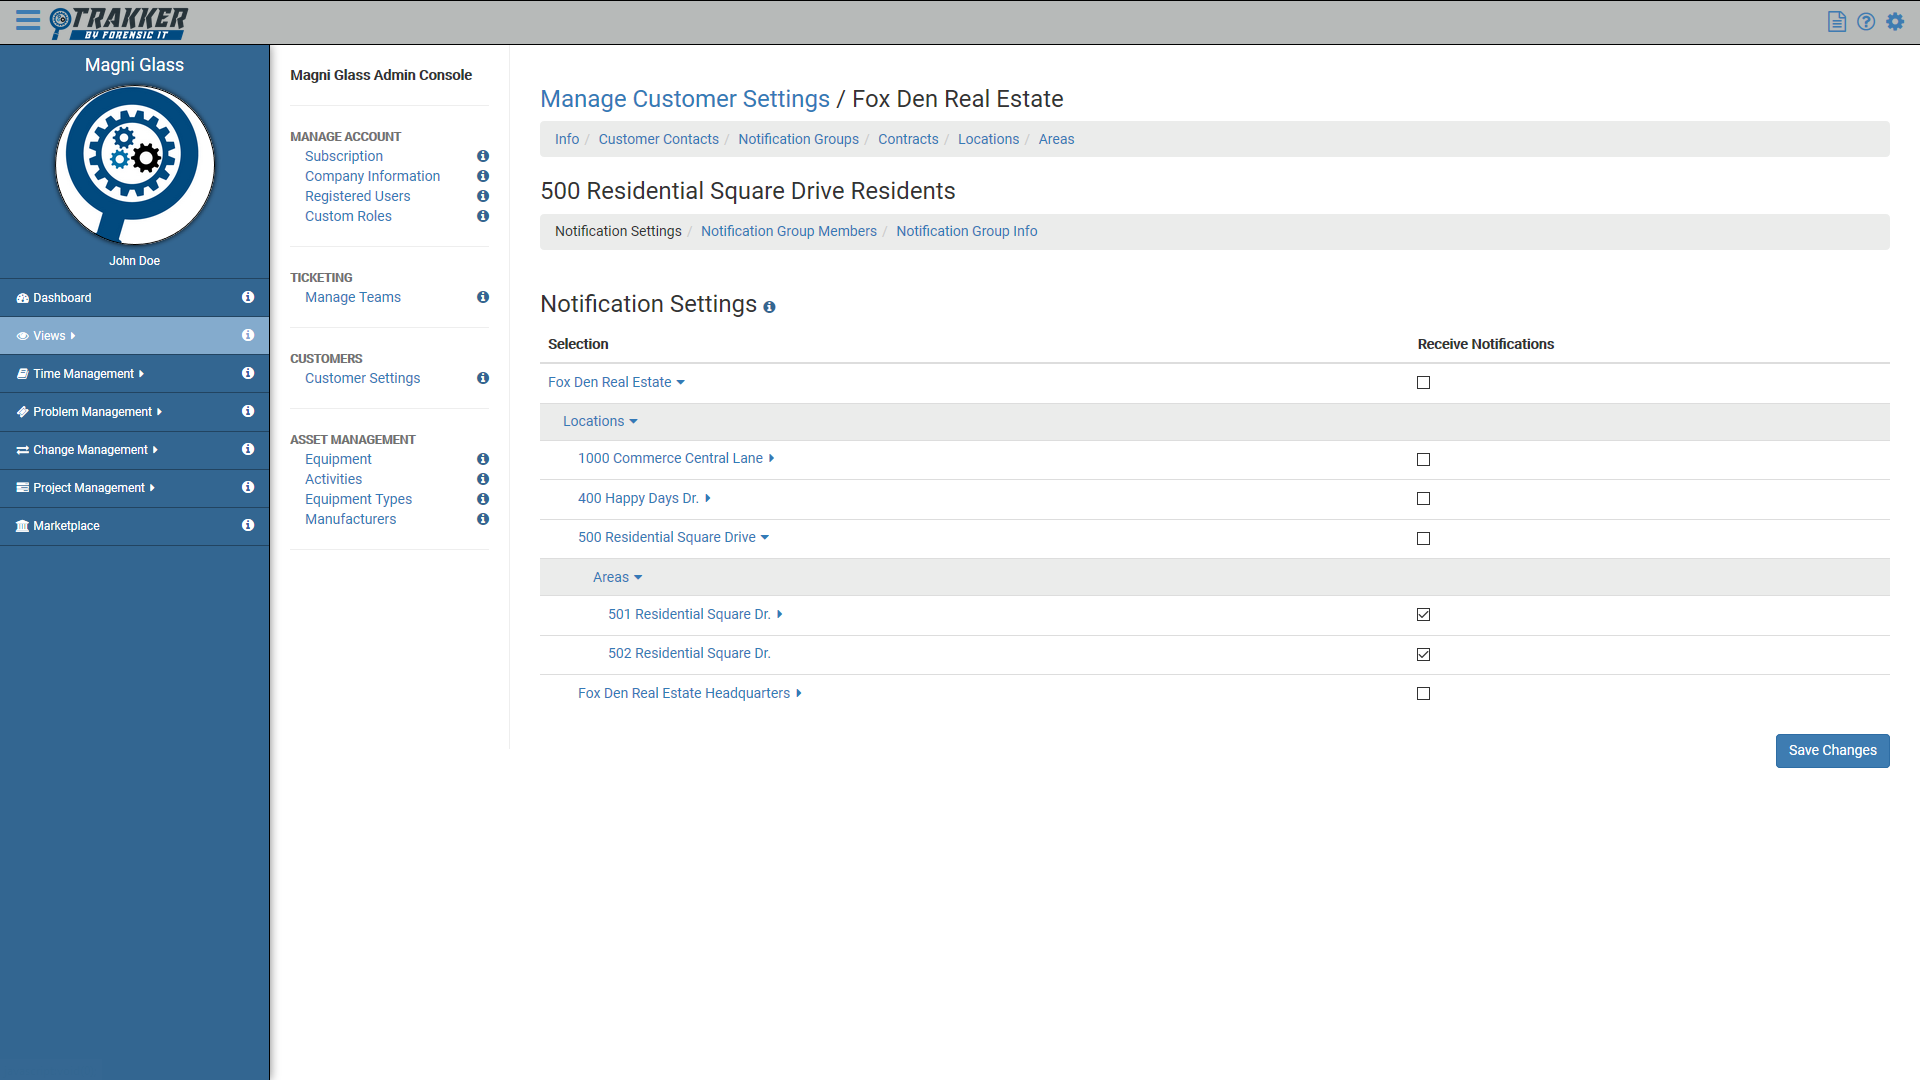
Configure Notification Settings
Please excuse our progress. We're currently putting together documentation for this feature.
If you require assistance, contact us with the direct chat in the bottom-right corner for support.
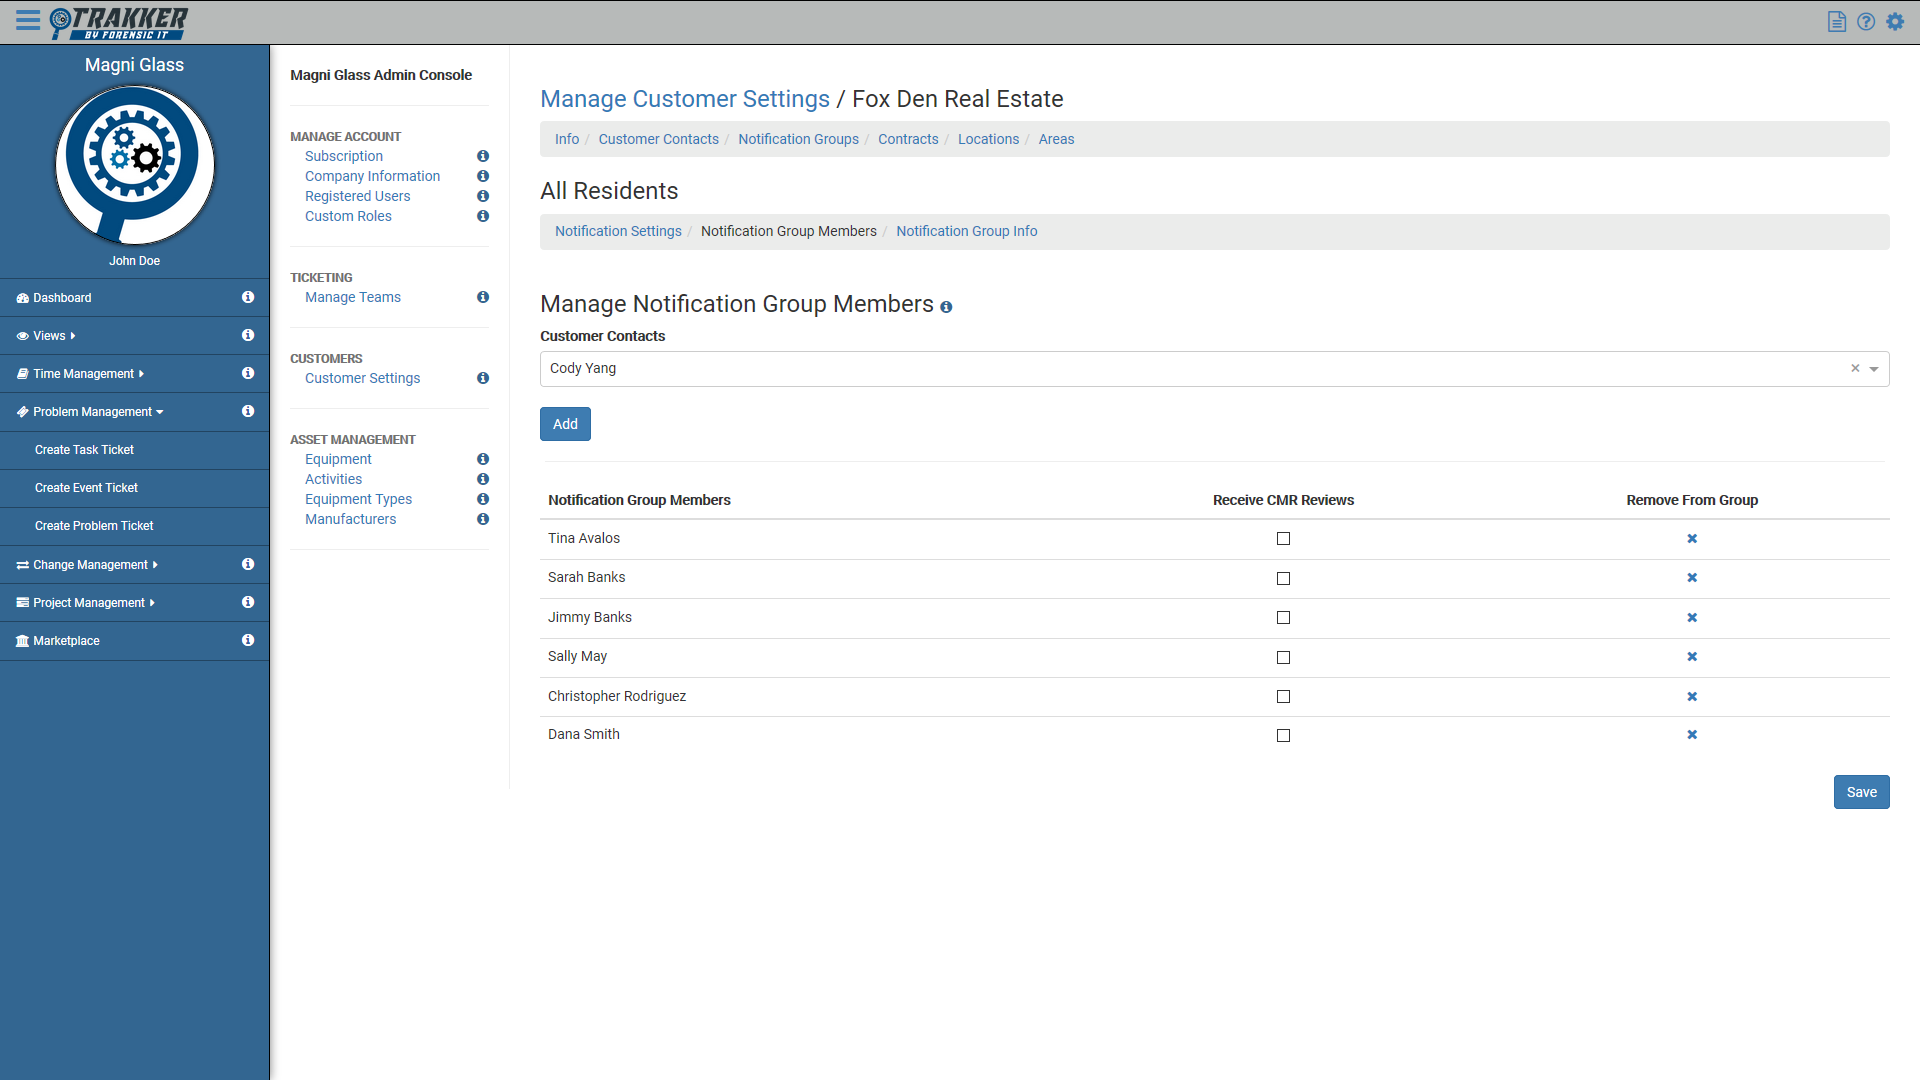
Add Notification Group Members
Please excuse our progress. We're currently putting together documentation for this feature.
If you require assistance, contact us with the direct chat in the bottom-right corner for support.
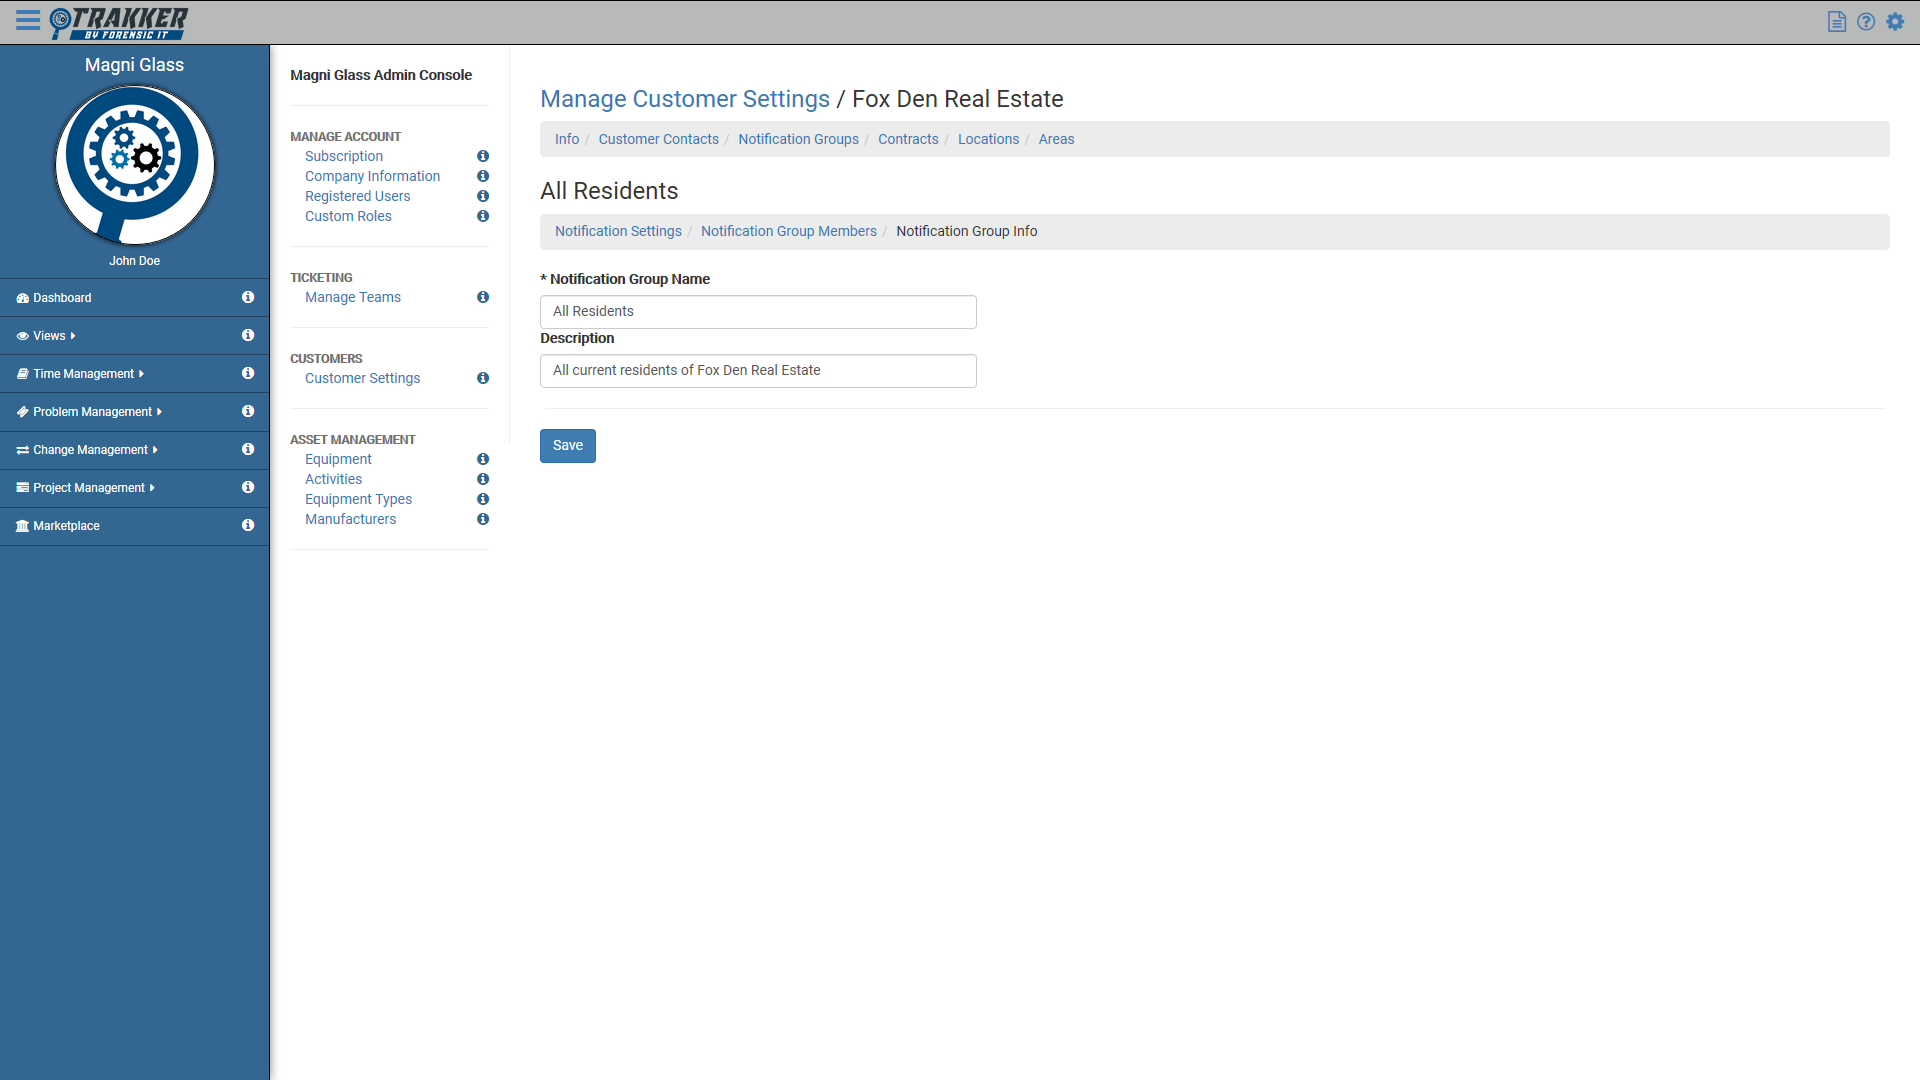
Edit Notification Group Info
Please excuse our progress. We're currently putting together documentation for this feature.
If you require assistance, contact us with the direct chat in the bottom-right corner for support.
Contracts
Contracts are associated with a company and used to group similar tickets together for time, cost and ticket tracking.
Locations
Creation of all ticket types begins in the Sidebar.
Please excuse our progress. We're currently putting together documentation for this feature.
If you require assistance, contact us with the direct chat in the bottom-right corner for support.
Areas
Creation of all ticket types begins in the Sidebar.
Please excuse our progress. We're currently putting together documentation for this feature.
If you require assistance, contact us with the direct chat in the bottom-right corner for support.